Moving Windows 10 install to an SSD

My fairly old Windows 10 machine was running very slowly, it was extremely annoying and I didn’t want to invest in a new machine. So moving the Windows 10 install to an SSD seemed like a option worth trying.

I didn’t want to get a new machine for two reasons really, one was I didn’t want to have to move all the data and apps etc to a new computer, and also I don’t use Windows much (so motivation was lacking). So investing in a new machine was also not really a high priority. I looked at the performance monitoring systems in Windows to try to figure out what the problem was. The machine at the time had 16GB of DDR2 ram, and 2 quad core AMD Opteron 2386 SE Processors (2.8GHz). Which, although isn’t super high spec (anymore) its not bad.

What was the problem?

Looking at the performance monitoring it became clear that it was the old system disk that was a 32oGB hard drive. Which was always at 100% use and just being hammered all the time. So decided that it was worth a shot to replace it with a SSD, to see if that would improve things enough to make the machine usable. If not I could use the SSD in a new system anyway.

The SSD Upgrade

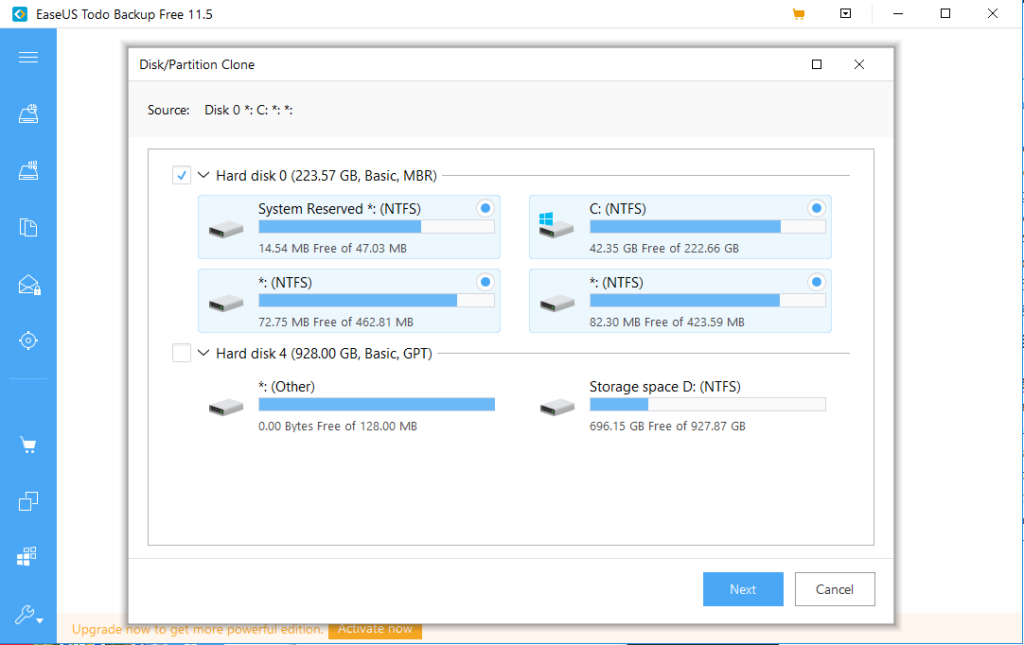
I bought a 250GB SSD drive, which was plenty big enough, and cost about £30. The next question was what was the best way to move the system drive over to the new disk. In such a way that nothing would then need to be re-installed. On Linux this is fairly easy, there are a load of free software that can do this. I wasn’t so sure on Windows. However after a quick search I found a EaseUS Todo Backup Free 11.5 which worked very well. The tool has a disk or partition clone mode, which is the bit you want. Here you have to make sure that you select the whole system drive, as there is a bunch of recovery partitions etc. So in the picture below I would choose Hard Disk 0, which selects all the partitions.

Hard disk cloning tool, which the source drive selected.

One the next screen you select the target drive. I cannot pick the target, as its not there. However you would select the SSD drive. For an SSD there is an additional step, where you should click ‘advanced options’ and and select optimise for SSD.

Select the target drive and if it an SSD click Advanced Options and select optimise for SSD.

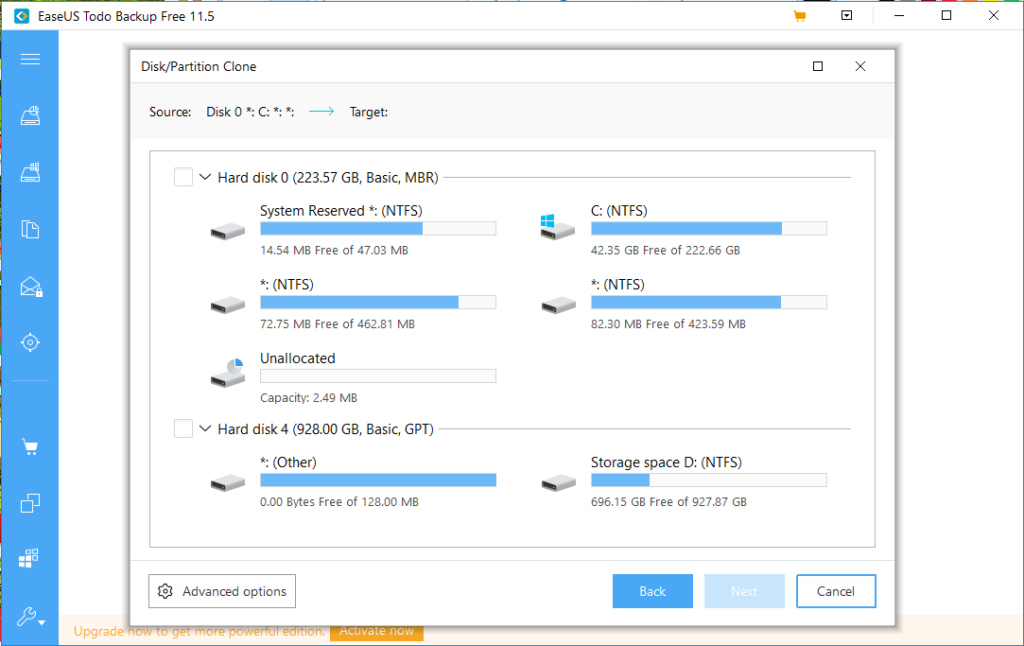
Once you have picked the target click next and then it is a simple process to start cloning the system drive onto the new SSD drive. This will take a little while and you can set the machine to shut itself down at the end.

You then just swap the drive over, and you might need to tell your computer to boot off that drive in the BIOS. It depends on if you have a load of other drives in the computer. All being well the computer will just boot up as normal, only with a bit of luck it will boot a lot quicker.

What was the outcome?

When I swapped the drive over I also put in different memory. I had a lot of memory from a server, so I put 32GB of ram in the machine at the same time. So I upgraded it to the SSD and 32GB of ram. The difference is huge!! It was well worth it, the machine is very much usable again. It boots in under a minute, and works well for what I use Windows for. This is a great option to put some life into an old machine. The CPUs and GPU in this computer are old, but the machine will do pretty much anything most people need.

You might have problems with updates after this saying that they cannot update the System Reserved partition. If you do then check out this guide from Microsoft about how to fix it.

DriverTuner and the generic solution that doesn’t work

I don’t spend much time with Windows, my desktops are largely Linux and my laptops Macs. I do have one rather ageing Windows machine, that recently got borked by an update. It was when I was reinstalling the drivers and software that Windows update couldn’t find that I came across DriverTuner. What a hateful piece of software this is. I have been using computers for years, and I started early enough to remember the days when you had to manually set IRQs on hardware with little jumpers. So tracking through a website using the model numbers of my hardware isn’t much of a hardship. I don’t believe it would be to anyone really, we can all navigate websites…

Therefore I found it extremely irritating that when trying to install both my Canon printer and Epson scanner that I kept navigating to a specific page only to download DriverTuner. On the Epson site it even downloaded in a zip file that looked like the correct version of Epson Scan. DriverTuner is irritating because it doesn’t seem to work, it failed to find anything to install on my computer. Not only that it also seemed to want me to buy it. Would it have made me buy it to get my drivers? To me DriverTuner is nothing more than an annoying, overly complex, failed, solution to a almost non-existent problem. Another piece of crapware clogging up my system.

Canon at least had a version of the drivers and software somewhere on their site that I was eventually able to locate and download. It installed and worked. Epson, not so. I had to resort to chatting to a helper to get a link to a page that I could download the driver from. Why, manufactures, insist on making everyone download this software? Why not let people try the automatic method if they want, and let those of us who want to just go to site and get the driver without any fuss do that?

Windows 10 Nvidia nForce RAID Update Troubles

So a resent update caused no end of problems with my Windows 10 machine. It would repeatedly fail to install the update, and then when it managed it I couldn’t log into the machine. User profile not accessible. I decided that it was probably time to re-install my machine anyway. However it seems the problem came back. A little different this time.

I reinstalled but chose to leave my Nvidia Soft/Fake RAID partition unchanged as I used it as my user space. The machine re-installed, and everything appeared to be fine. I could get to the RAID array, so I left it as is and went about installing drivers and updates. Updates! This is the problem. It seems I have become one of the many victims of a Windows 10 update that stops Nvidia RAID arrays from working (see here in German). So no sooner had I updated the machine and restarted, the RAID array vanished again. So annoying. This machine is a little old but it is by no means obsolete. Its a dual quad-core opteron with 16GB of ram and a half decent GPU. Plenty of live left in it yet, esp as all I use it for is scanning and printing photographs. The RAID array still reports as healthy at boot. I suppose I should have known not to trust a fake/soft RAID long term. However, wasn’t expecting an update to do it in. So what to do… Buy a cheap RAID card off ebay and use that, turn off Nvidia RAID and use the Windows fake RAID instead? Whatever, they should have warned us of this potential if they knew.