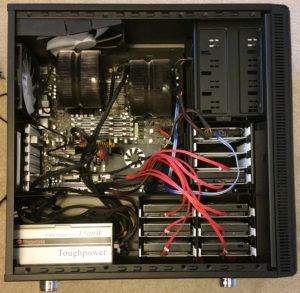
I have the base components of my new UNRAID server. I got a Chinese X99 dual CPU motherboard off eBay, it’s the ZX-DU99D4 V1.11. Which I will be running two Xeon E5-2650LV3 with 64GB of Ram (both used of eBay). This will be a great base system for playing with VMs and dockers etc in UNRAID using the ZX-DU99D4, as well as running backups.
Category: Hardware
Cloning System Disk with Clonezilla
Home Server Upgrade
Lenovo ThinkPad Carbon X1 (20KH) 6th Gen Linux (Ubuntu 18:04)
I have received a new Lenovo ThinkPad Carbon X1 (6th generation, mine is the 20KH model with NFC and the higher res screen) which I have been trying to get Kubuntu 18:04 LTS Linux running on. This has been largely successful with a few problematic areas. Mostly the trackpad. I am a fan of mouse pointer emulation, which allows you to do one finger tap for mouse left click, two finger for right click, and three for middle. This is what I haven’t been able to get working really.
The Trackpad
The problems with the trackpad are that it would be slow to start working on boot, and often when waking from sleep. Also mouse button emulation intermittently failed. This would be accompanied with CPU usage spikes that I think were some sort of driver crashing, trace state, or similar.
Edit: This is probably the fix we are looking for! Install xserver-xorg-input-synaptics (which for me is xserver-xorg-input-synaptics-hwe-18.04). The left ‘i2c_i801’ commented out of the ‘/etc/modprobe/blacklist.conf’. This seems to have got it. I now have a trackpad that works on boot and after waking from sleep. I also have the config controls in the settings. So I think this is the way forward. In addition, as the physical buttons did occasionally stop working after reboot, I suggest getting the pm-utils to run the following commands at wake up which I put in a bash script.
#!/bin/bash
#reconnects trackpad after sleep

case "$1" in
    post)
        echo -n "none" | sudo tee /sys/bus/serio/devices/serio1/drvctl
        echo -n "reconnect" | sudo tee /sys/bus/serio/devices/serio1/drvctl
    ;;
esac
The best place for the bash script in Ubuntu 18.04LTS is in a file in /lib/systemd/system-sleep/ which I called trackpad, make sure you make it executable.
Possible fix one: Getting the trackpad working might require that ‘i2c_i801’ is commented out of the ‘/etc/modprobe/blacklist.conf’. This will fix the problems with it being detected on start and coming out of sleep.
However… possible fix two: You might have more success with leaving ‘i2c_i801’ on the blacklist and adding ‘psmouse.synaptics_intertouch=1’ to you grub config (‘/etc/default/grub’) and then running ‘sudo update-grub’. This seems also to work.
So this is the problem with intermittent faults. Getting to the bottom of the problem and the solution is very difficult. So I would suggest you try both and see what works better.
It will not however fix the problems with mouse click emulation intermittently failing. That I have not found a fix and instead switched it off altogether. You are then left with using the mouse buttons.
Sleeping
To get sleeping working correctly you need to make use that in the BIOS the sleep mode is set to Linux instead of windows. That is it. Without that then the system will not come in and out of sleep properly.
Other than these issues, and the WAN modem not working (no driver), the laptop seems to work well.
Moving Windows 10 install to an SSD
My fairly old Windows 10 machine was running very slowly, it was extremely annoying and I didn’t want to invest in a new machine. So moving the Windows 10 install to an SSD seemed like a option worth trying.
I didn’t want to get a new machine for two reasons really, one was I didn’t want to have to move all the data and apps etc to a new computer, and also I don’t use Windows much (so motivation was lacking). So investing in a new machine was also not really a high priority. I looked at the performance monitoring systems in Windows to try to figure out what the problem was. The machine at the time had 16GB of DDR2 ram, and 2 quad core AMD Opteron 2386 SE Processors (2.8GHz). Which, although isn’t super high spec (anymore) its not bad.
What was the problem?
Looking at the performance monitoring it became clear that it was the old system disk that was a 32oGB hard drive. Which was always at 100% use and just being hammered all the time. So decided that it was worth a shot to replace it with a SSD, to see if that would improve things enough to make the machine usable. If not I could use the SSD in a new system anyway.
The SSD Upgrade
I bought a 250GB SSD drive, which was plenty big enough, and cost about £30. The next question was what was the best way to move the system drive over to the new disk. In such a way that nothing would then need to be re-installed. On Linux this is fairly easy, there are a load of free software that can do this. I wasn’t so sure on Windows. However after a quick search I found a EaseUS Todo Backup Free 11.5 which worked very well. The tool has a disk or partition clone mode, which is the bit you want. Here you have to make sure that you select the whole system drive, as there is a bunch of recovery partitions etc. So in the picture below I would choose Hard Disk 0, which selects all the partitions.
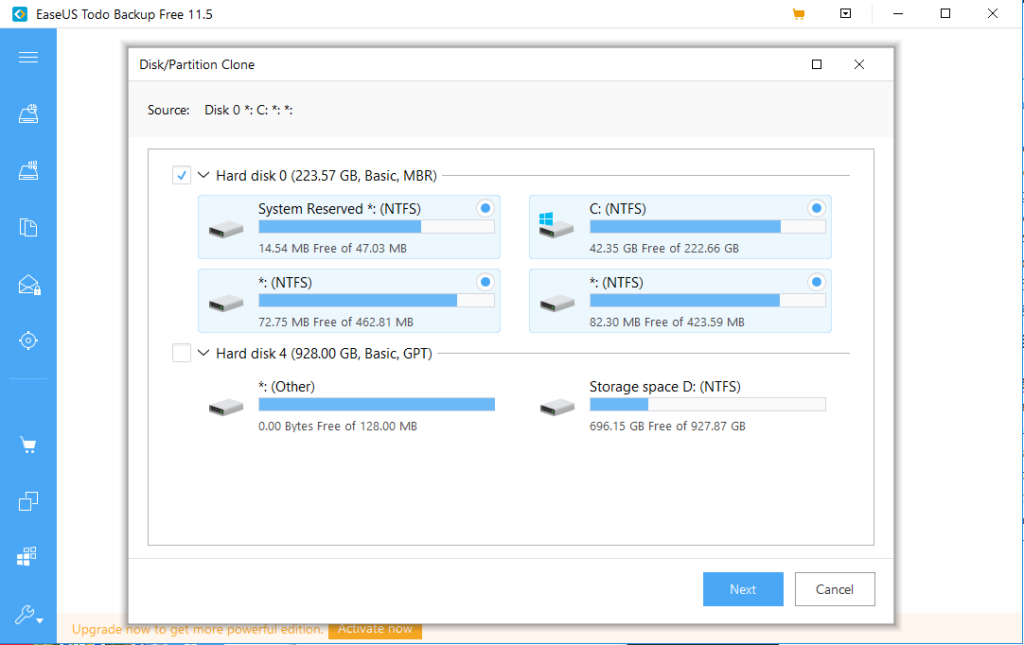
One the next screen you select the target drive. I cannot pick the target, as its not there. However you would select the SSD drive. For an SSD there is an additional step, where you should click ‘advanced options’ and and select optimise for SSD.
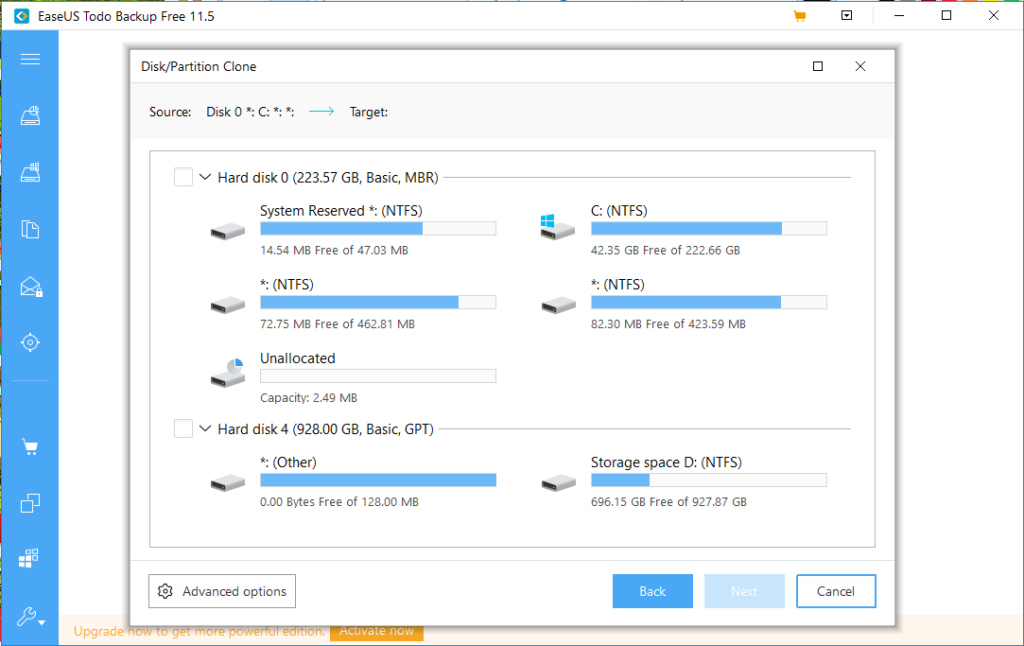
Once you have picked the target click next and then it is a simple process to start cloning the system drive onto the new SSD drive. This will take a little while and you can set the machine to shut itself down at the end.
You then just swap the drive over, and you might need to tell your computer to boot off that drive in the BIOS. It depends on if you have a load of other drives in the computer. All being well the computer will just boot up as normal, only with a bit of luck it will boot a lot quicker.
What was the outcome?
When I swapped the drive over I also put in different memory. I had a lot of memory from a server, so I put 32GB of ram in the machine at the same time. So I upgraded it to the SSD and 32GB of ram. The difference is huge!! It was well worth it, the machine is very much usable again. It boots in under a minute, and works well for what I use Windows for. This is a great option to put some life into an old machine. The CPUs and GPU in this computer are old, but the machine will do pretty much anything most people need.
You might have problems with updates after this saying that they cannot update the System Reserved partition. If you do then check out this guide from Microsoft about how to fix it.
TensorFlow GPU Kubuntu LTS
I wanted to install TensorFlow GPU on my Kubuntu System (currently 16:04 LTS but I believe it also works for 18.04LTS). I am interested in trying TensorFlow with both Java and Python, I have done some testing with Python so far. Java I will try later.
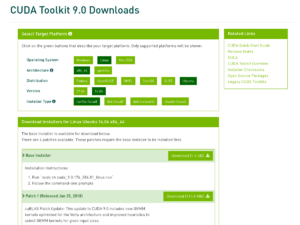
I first updated my system to ensure that all the packages were up to date, and I also used the Driver utility to install the NVidia Driver, version 396.54. TensorFlow uses Cuda 9.0 at the minute so you have install the version, you can get it here. I use the local runfile, this is as it is an easy way of getting cuda installed in /usr/local and the samples installed in your home directory. If like me you have already installed the Nvidia drivers, skip the step to install the drivers as its not required.
Once you have it downloaded run it, remembering to skip the driver install if you have them installed already.
sudo ~/Downloads/cuda_9.0.176_384.81_linux-run
TensorFlow also needs Nvidia cuDNN to work, you have to join as a Nvidia developer and then you can download this, pick the version for Cuda 9.0.
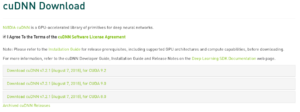
This can easily be installed in the terminal.
tar xvzf cudnn-9.0-linux-x64-v7.2.1.38.tgz
sudo cp -P cuda/include/cudnn.h /usr/local/cuda-9.0/include
sudo cp -P cuda/lib64/libcudnn* /usr/local/cuda-9.0/lib64
sudo chmod a+r /usr/local/cuda-9.0/include/cudnn.h /usr/local/cuda-9.0/lib64/libcudnn*
Make sure that your .bash_profile file in your home dir contains something like (I am not sure the last one is needed, seems to be in there from ages ago):
export PATH=/usr/local/cuda/bin:$PATH
export LD_LIBRARY_PATH=/usr/local/cuda/lib64:$LD_LIBRARY_PATH
export LD_LIBRARY_PATH="$LD_LIBRARY_PATH:/usr/local/cuda/lib64:/usr/local/cuda/extras/CUPTI/lib64"
export CUDA_HOME=/usr/local/cuda
Note that I have a symlink from /usr/local/cuda to /usr/local/cuda-9.0/. That is cuda installed, you can check it is working by compiling one of the samples that use it.
Next install TensorFlow, I did this in the python evironment, the full details are here. As I have a Tesla K20 in this system I installed the version with GPU support. I use python 3.5.
#install pip and virtualenv
$ sudo apt-get install python3-pip python3-dev python-virtualenv

#upgrade pip
$ sudo pip install -U pip

#make a dir to work out of
$ mkdir ~/tensorflow
$ cd ~/tensorflow

# I chose Python3 environment for the environment directory:
$ virtualenv --system-site-packages -p python3 environment_dir

#activate the environment
$ source ~/tensorflow/environment_dir/bin/activate

#in the virtual environment upgrade pip
(environment_dir)$ pip install -U pip

#then install tensorflow with gpu support
(environment_dir)$ pip install -U tensorflow-gpu

#check it works
(environment_dir)$ python -c "import tensorflow as tf; print(tf.__version__)"
That should be it!
A Beast
I have been cleaning up and resurrecting a beast of a computer. Its a dual Xeon 3.16GHz, with 8GB of RAM. Its not that high spec compared with today’s hardware. Has a fairly average GPU and a RAID card with currently 7x 500GB HDs, and 1TB system disk. I think I will get it going. Maybe find a use for it. Perhaps as web scraper or something. That or I could sell it. Gonna have to get a HD off eBay to make up the 8, that and find the Sata PSU cables!

